For anyone with curls or waves, the dream is always bouncy, defined hair, but the reality is often a frustrating battle with frizz and products that leave your hair crunchy. If you’re ready to end that struggle, you’re in the right place. This is your ultimate step-by-step guide to using the hero product that’s changing the game: the Hair-resurrection Curling Mousse. Get ready to learn the simple techniques that will give you quick, frizz-free, and perfectly defined curls every single time.For anyone with curls or waves, the dream is always bouncy, defined hair, but the reality is often a frustrating battle with frizz and products that leave your hair crunchy. If you’re ready to end that struggle, you’re in the right place. This is your ultimate step-by-step guide to using the hero product that’s changing the game: the Hair-resurrection Curling Mousse. Get ready to learn the simple techniques that will give you quick, frizz-free, and perfectly defined curls every single time.
Why the Hair-resurrection Curling Mousse is a True Game-Changer
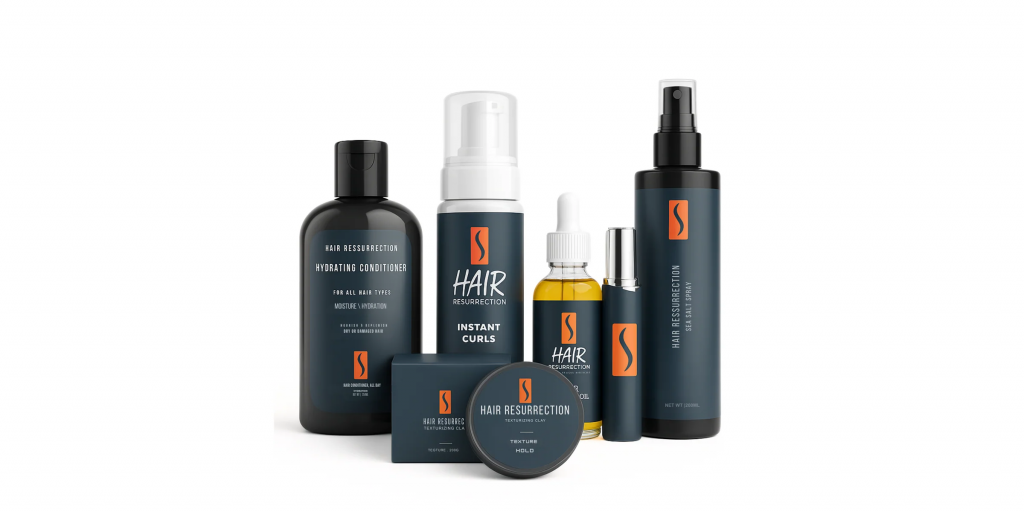
Before we jump into the tutorial, let’s talk about why this isn’t just another mousse. The team at Hair-resurrection—already known for their incredible hair growth solutions—have poured their expertise into creating what might just be the best mousse for curly hair on the market.
Here’s what makes it stand out:
- Lightweight & Non-Sticky Formula: This is the number one rule for great curls. The Hair-resurrection mousse has a cloud-like texture that won’t weigh your hair down, allowing for maximum volume and bounce. Forget that sticky feeling you hate; this formula is all about touchable softness.
- Powerful Frizz Control: Infused with ingredients that seal the hair cuticle, this mousse is your ultimate defense against humidity. It works to create smooth, frizz-free curls that last all day long.
- Flexible, Touchable Hold: Nobody wants stiff, crunchy “ramen noodle” curls. This mousse provides a flexible hold that defines your curl pattern beautifully while still allowing for natural movement and softness.
- Enhances Shine and Definition: It doesn’t just hold your curls; it makes them look healthier. The formula enhances your hair’s natural luster and helps individual curl clumps form for that perfect, defined look.
It’s one of the best styling products for curls because it delivers on every promise.
The Ultimate Hair-resurrection Mousse Tutorial: 5 Steps to Perfect Curls
Ready for your new quick curly hair routine? Let’s get started. For best results, follow these steps precisely.
Step 1: Start with Soaking Wet Hair
This is the most important, non-negotiable step! Do not towel-dry your hair aggressively. You want to apply the mousse to soaking wet hair (some stylists say it should be “seaweed wet”). This allows the product to distribute evenly and encapsulate your curl clumps before frizz has a chance to form. It’s best to do this right out of the shower.
Step 2: Apply a Leave-In Conditioner (Optional but Recommended)
For extra moisture and slip, especially if your hair is dry or color-treated, apply a small amount of your favorite leave-in conditioner first. Rake it through gently with your fingers to detangle. This creates a hydrated base for the mousse to work its magic.
Step 3: The Perfect Hair-resurrection Mousse Application
How to Apply Curling Mousse for Flawless Results
Now for the main event. Here’s how to apply curling mousse to achieve perfectly defined curls:
- Dispense the Right Amount
- Start by shaking the can well to activate the mousse’s formula.
- Dispense a cloud of Hair-resurrection mousse into your palm. For shoulder-length hair, a golf ball-sized amount is an ideal starting point. If your hair is thicker or longer, you may need slightly more. Always begin with less—you can add more mousse later if necessary without weighing your hair down.
- Glaze, Don’t Rake
- Rub your palms together to evenly distribute the mousse across both hands.
- Instead of raking your fingers through your hair—which can disrupt natural curl clumps—gently glaze the product over the surface of each section of hair.
- Work in sections, applying the mousse by smoothing it over strands rather than pulling or combing through aggressively. This method preserves curl formation and reduces frizz.
- Scrunch, Scrunch, Scrunch!
- After applying mousse, encourage your curls by scrunching your hair upward toward the scalp.
- Cup small sections in your palm and gently squeeze and push them up repeatedly.
- Listen for a satisfying “squishing” sound; this indicates that your hair is properly hydrated and that the mousse is locking in moisture and shape.
- Repeat this scrunching technique all over your head to promote uniform curl definition.
Pro tip: Avoid touching or disturbing your curls once they start drying to maintain their bounce and reduce frizz.
- By following these steps precisely, you ensure every strand is coated without disrupting natural curl patterns—setting you up for soft, lively curls that last all day.
Step 4: Choose Your Drying Method
You have two great options for achieving your easy curly hairstyles:
- Method A: Air-Drying for Heatless Curls
- For a low-maintenance approach, you can let your hair air-dry. To speed up the process and enhance your curls, try “plopping.”
- Lay a cotton t-shirt or microfiber towel on a flat surface, flip your hair forward onto it, then wrap the fabric around your head like a turban.
- Let it sit for 15-30 minutes to absorb excess water without creating frizz.
- Then, unwrap and let it finish air-drying. This technique is the secret to amazing heatless curls that are bouncy and full of life.
- Method B: Diffusing for Speed and Volume
- If you’re short on time, a diffuser is your best friend.
- Attach it to your blow dryer and use it on a low speed and low heat setting.
- Gently cup sections of your hair in the diffuser bowl and bring it up to your scalp, holding for 30-60 seconds before moving to the next section.
- Avoid moving the dryer around too much to prevent frizz while enhancing volume.
Step 5: Scrunch Out the Crunch (SOTC)
Once your hair is 100% dry, you may notice it feels slightly firm or “crispy.” This is a good thing! It’s called a “cast,” and it’s what has been protecting your curls and holding their shape while they dry.
The final step is to gently break this cast:
You can do this by simply scrunching your hair again with dry hands, or by adding a single drop of hair oil to your palms first for extra softness and shine.
By scrunching out the crunch, you’ll be left with incredibly soft, defined, and long-lasting curls that look effortless yet beautifully styled.
Pro Tips for Your Hair Type with Hair-resurrection
The beauty of the Hair-resurrection Curling Mousse is its versatility. Here’s how to adapt the technique for your hair type:
A Guide for Fine or Wavy Hair
If you have finer hair or looser waves, it’s important to use a lighter touch with product application. Here’s how to maximize your results:
- Use less mousse: Applying too much can weigh your hair down and reduce natural movement.
- Focus on root lift: When scrunching, concentrate on lifting the hair at the scalp to add volume and bounce.
- Diffuse carefully: Use a diffuser attachment on a low heat, low speed setting to enhance your wave pattern without causing frizz or flattening.
- Avoid heavy oils: Instead of heavy serums, opt for lightweight oils if needed to maintain softness without compromising volume.
This mousse is an excellent choice for wavy hair because it enhances definition while keeping your hair feeling light and airy, preserving natural texture without stiffness.
A Guide for Thick, Curly Hair
Thick, curly hair often requires more product and attention to detail. Follow these tips for best results:
- Apply generously: Don’t hesitate to use more mousse to coat each strand fully; this helps maintain curl shape throughout the day.
- Divide into sections: Working in 4-6 sections ensures even application and better curl formation.
- Use the “prayer hands” method: Smooth the mousse down each section by pressing your palms together and running them along the strands. This technique seals cuticles and prevents frizz before scrunching.
- Scrunch with intention: After smoothing, scrunch upward towards roots to encourage curl clumping and definition.
Using these steps will help you achieve well-defined curls with controlled volume and reduced frizz.
A Guide for Coily or Kinky Hair
For type 4 hair textures, maintaining moisture balance is essential. The Hair-resurrection mousse complements a hydrating routine perfectly:
- Layering is key: Apply the mousse last in your styling process after a rich leave-in conditioner and curl cream have moisturized your coils.
- Flexible hold: The mousse provides a soft yet effective hold that enhances natural coil patterns without stiffness.
- Versatile styles: Ideal for wash-and-go looks, twist-outs, or braid-outs where definition and longevity are crucial.
- Seal moisture: Consider lightly sealing ends with an oil after applying mousse to lock in hydration.
This approach supports healthy, bouncy coils while preventing dryness—giving you flexible control over your style throughout the day.
Unlock Your Best Curls and an Amazing Deal!
You are now officially equipped with the professional techniques to achieve the curls of your dreams. This Hair-resurrection mousse review and tutorial shows that with the right product and the right method, gorgeous, defined curls are not only possible but incredibly easy.
Are you ready to stop fighting with your hair and start loving it? It’s time to add this hero product to your styling arsenal.
Click here to get our exclusive coupon and save on your order of Hair-resurrection Curling Mousse today! Your journey to effortless, beautiful curls starts now. Shop the entire Hair-resurrection collection here!